0x01 堆的工作原理
实验环境:
| 推荐使用环境 | 备注 | |
|---|---|---|
| 操作系统 | Windows20000虚拟机 | 分配策略对操作系统非常敏感 |
| 编译器 | Visual C++ 6.0 | 默认编译选项 |
| 编译选项 | 默认编译选项 | VS2003/VS2005的GS选项将导致实验失败 |
| build 版本 | release | VS2003/VS2005的GS选项将导致实验失败 |
| 调试器 | Ollydbg | 需要配置Make OllyDbg just-in-time debugger选项 |
调试代码如下:
1 |
|
调试过程:
(1)在 VC6.0 中设置 build 为 Release 版本,并在 OllyDbg 中 “Options” 菜单中选中 “Just-in-time debugging”,单击 “Make OllyDbg just-in-time debugger”,然后单击 “Done” 按钮确认。
(2)运行上面程序之后,在系统出现错误提示的时候,选择“取消”,将会进入OD进行调试: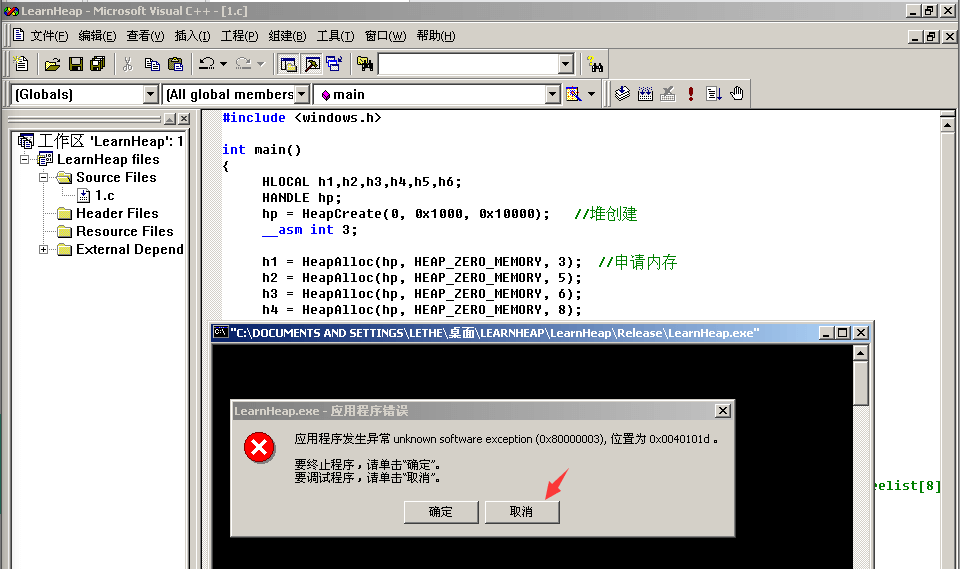
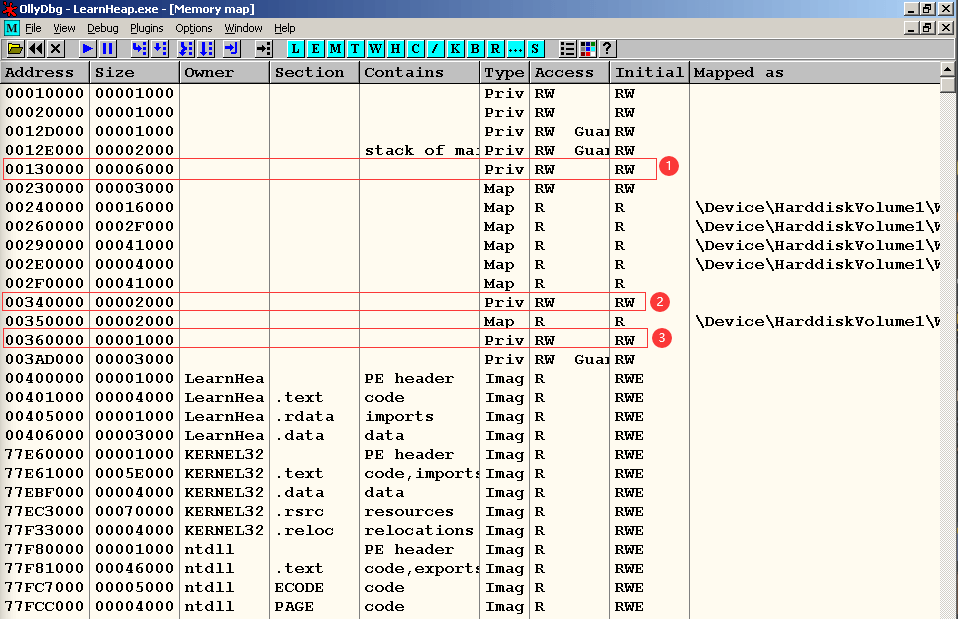
(3)使用Alt+M可以查看当前内存映射状态,一般来说,进程中会存在若干堆区,如下:
- 为测试进程包含的一个始于0x00130000大小为0x6000的进程堆,可以通过GetProcessHeap()获得这个堆的句柄。
- 为malloc创建的堆。
- 为我们代码中创建的堆。
0x02 识别堆表
在程序初始化过程中,malloc 使用的堆和进程堆都已经经过了若干次分配和释放操作,里边的堆块相对比较“凌乱”。因此,我们在程序中使用 HeapCreate() 函数创建一个新的堆进行分析。
HeapCreate()成功地创建了堆区之后,会把整个堆区的起始地址返回给 EAX,这里是0x00360000: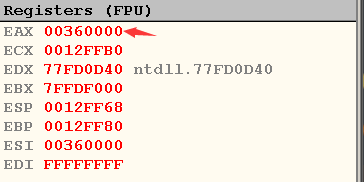
通过 Ctrl+G 到 0x00360000 的内存中进行查看, 从 0x00360000 开始,堆表中包含的信息依次是段表索引(Segment List)、虚表索引(Virtual Allocation list)、空表使用标识(freelist usage bitmap)和空表索引区。
我们主要观察偏移 0x178 处的空表索引区,偏移0x00360178即为是空表的头。
可以看到:
- freelist[0] 指向目前堆中唯一的一个尾块(0x00360688),共八个字节(前四个字节是前向指针,后四个字节是后向指针)。
- 除零号空表索引外,其余各项索引都指向自己,说明这些空闲链表都为空。
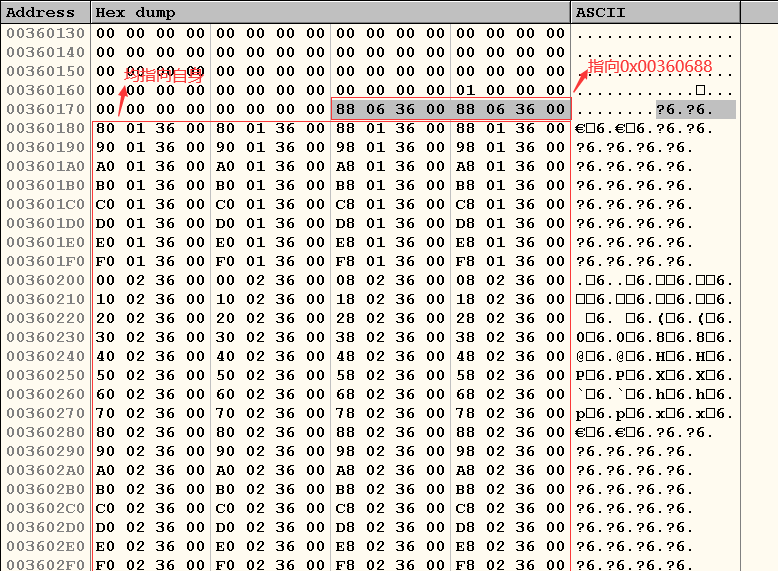
可以看到块尾(0x00360688)的指针同样是指向 freelist[0] 的(0x00360178):
块首的具体含义可借鉴下图: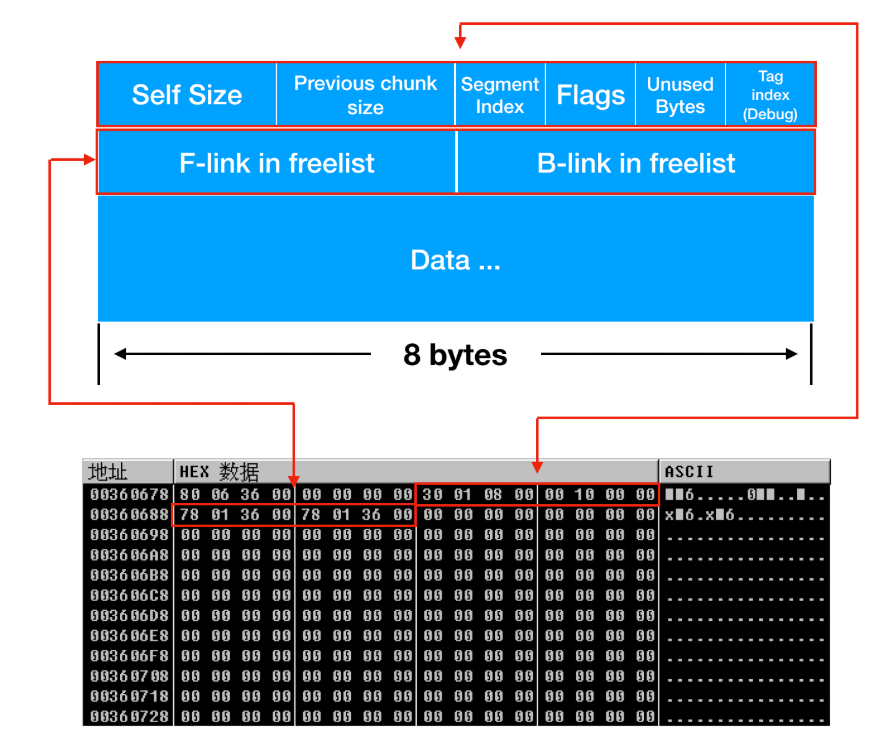
0x03 堆块的分配
堆块的分配细节如下:
- 堆块大小包含块首,故,如果申请32字节,那么实际被认为申请的是40字节(8字节块首+32 字节块身)
- 堆块的单位是8字节,不足8字节将按8字节分配
- 初始状态下,快表和空表为空,不存在精确分配。所以将使用次优块分配,即尾块
- 由于次优分配,尾块会被陆续切走一些小块,它的块首中的 size 信息会改变,并且 freelist[0] 会指向新的尾块位置
所以对于我们程序中的前 6 次连续的内存请求,实际分配情况如下:
| 堆句柄 | 请求字节数 | 实际分配(堆单位) | 实际分配(字节) |
|---|---|---|---|
| H1 | 3 | 2 | 16 |
| H2 | 5 | 2 | 16 |
| H3 | 6 | 2 | 16 |
| H4 | 8 | 2 | 16 |
| H5 | 19 | 4 | 32 |
| H6 | 24 | 4 | 32 |
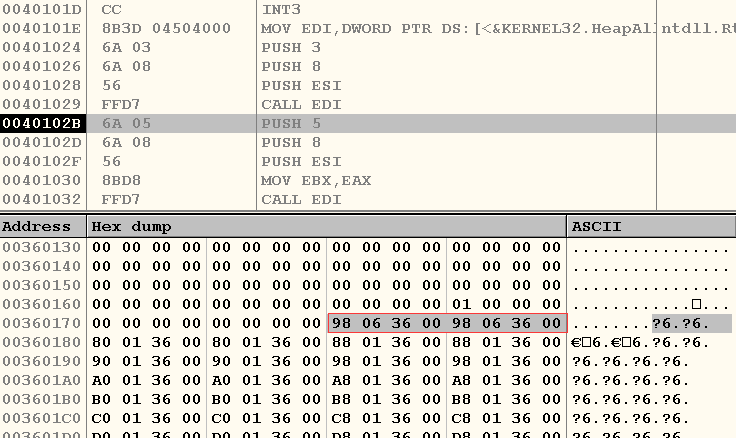
在CPU窗口,命令F8单步执行程序到地址:0x0040102B处,这时我们执行完了
1 | h1 = HeapAlloc(hp, HEAP_ZERO_MEMORY, 3) |
当h1被分配以后直接查看freelist[0](0x00360178),发现指向的地址由0x00360688变成了0x00360698:
接着查看0x00360698: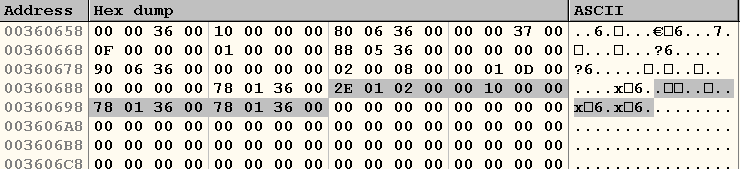
从图中可以看出:分配给h1的大小为0x0002, size=16bytes
继续单步运行到地址0x00401059,将h1~h6全部分配完,此时查看0x00360178指向了0x00360708: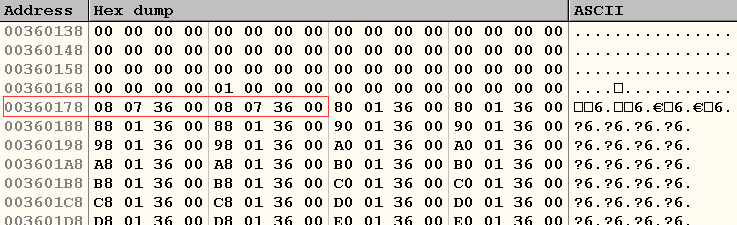
查看0x00360708:
可以发现,如今的尾块长度为0x0120个堆单位。一开始时为0x0130个堆单位,差值为16个堆单位,这恰恰是前六次分配出去的内存之和。
根据最后一次调用HeapAlloc后EAX中返回的指针,我们可以找到最后一次分配的内存位置:
然后再往前搜索,可以发现前5次的分配。在下图中,我们用前6个红框标出了6次分配所得堆块的块首: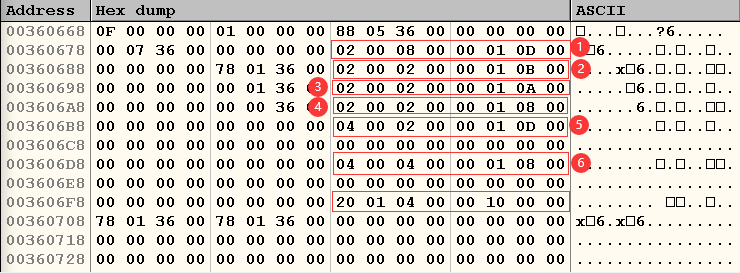
可以看到实际分配的堆单位符合表中的2、2、2、2、4、4。第7个红框标出的是新的尾块的块首,即尾块不断向后移动。
0x04 堆块的释放
单步运行至0x00401077处,此时释放了堆块 h1、h3、h5。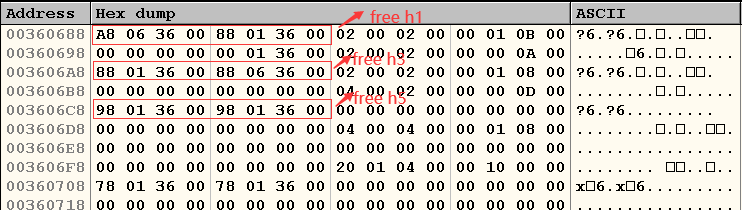
可知:h1、h3分别被释放到 freelist[2] 空表中, h5被释放到了freelist[4]空表中。此时freelistp[2]的前向指针指向关系为:0x00360688→0x00360A88→0x00360188,其他类似。

由于这三次释放的堆块在内存中不连续,所以不会发生合并。到目前为止,有三个空闲链表上有空闲块,分别是freelist[0]、freelist[2]、freelist[4]。
0x05 堆块的合并
继续将程序运行到 0x401080地址处,即执行了如下代码:
1 | HeapFree(hp,0,h4); |
当释放h4的时候由于出现了两个连续的空闲块,所以会发生堆块的合并现象。h3、h4、h5彼此相邻,它们合并后是8个堆单位,所以将被链入freelist[8]。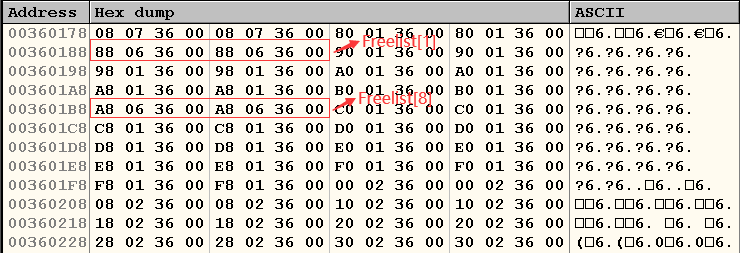
可以看到原来链接着h1、h3的Freelist[2]现在只剩h1(0x00360688),而Freelist[8]则链接了合并过后的新块(0x003606A8)。
我们来看0x003606A8,可以看到合并后的新块大小已经被修改为 0x0008,其空表指针指向 0x005201B8,也就是 freelist[8]的地址。
0x06 快表的使用
调试代码如下:
1 |
|
同样的方式用OD进行调试,查看 0x00360178 内存地址:
可以发现,freelist[0] 中的尾块的位置不在 0x00360688 了,那个位置被快表占据。
去 0x00360688 看一下当前的快表,可以看到堆刚初始化后快表是空的: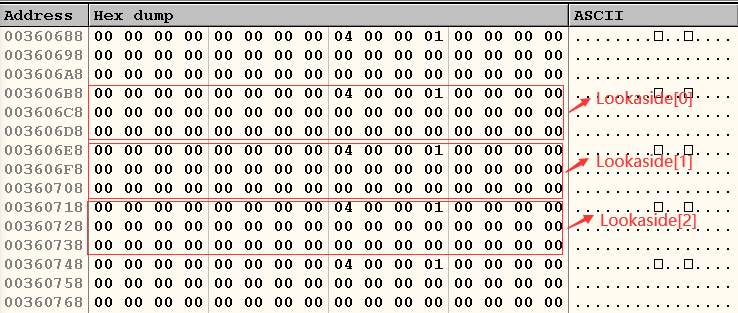
下面,首先从FreeList[0]中依次申请8、8、16、24字节的内存,然后进行释放到快表中(快表未满时优先释放到快表中)。根据三个堆块的大小我们可以知道8字节的会被释放到Lookaside[1]中、16字节的会被释放到Lookaside[2]中、24字节的会被释放到Lookaside[3]中。
接下来我们把程序运行到第四次释放之后。我们释放的空间依次是(包含块首)16、16、24、32,由于快表此时未满,所以它们被插入快表中,分别插在lookaside[1]、[2]、[3]中,如下: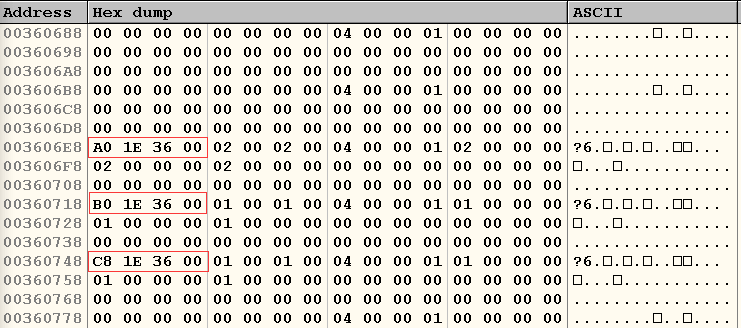
链在快表中的堆块块首的Flag值为0x01,即Busy。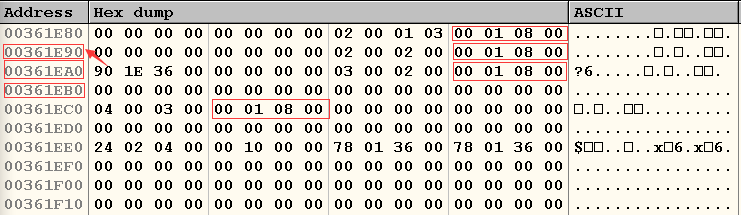
继续将断点下在下面这行代码之后:
1 | h2 = HeapAlloc(hp, HEAP_ZERO_MEMORY, 16); |
由于h2的再次被申请,而优先从快表中分配,所以lookaside[2]会再次变为空,如下: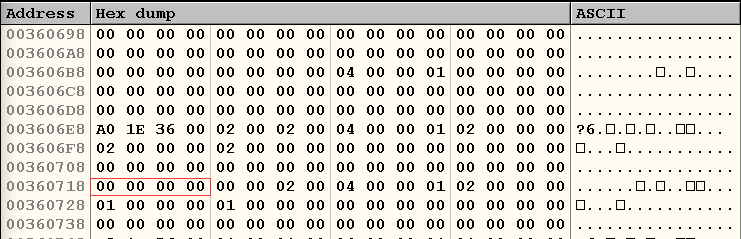
0x07 堆溢出利用之DWORD SHOOT
调试代码:
1 |
|
上述代码中申请六次空间,然后释放三次,把奇数次申请的空间释放掉(避免堆块合并),此时freelist[2]中应该链入了三个空闲堆块h1、h3、h5。
在此之后,倒数第二行代码再次申请空间,会导致freelist[2]的最后一个堆块(即之前的h5)被卸下。如果我们在调用申请函数的汇编指令之前把h5的前后指针按照前面所描述的方式修改掉,就会出现“DWORD SHOOT”。
我们将断点下载执行完六次申请、三次释放后,即将执行最后一次申请前调试状态如下:
Freelist[2]前向指针指向0x00360688(即h1)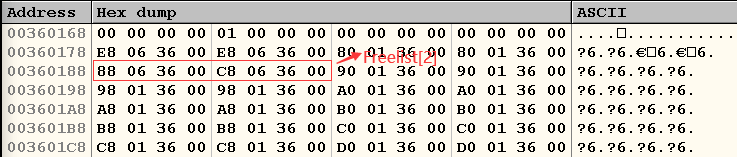
继续查看0x00360688,如下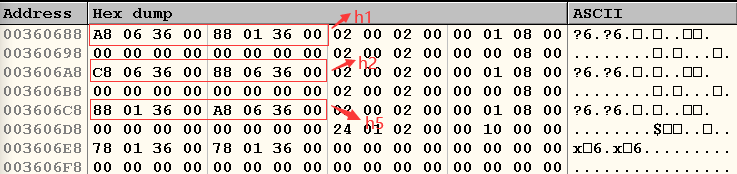
此时EBP的值为:0x0012FF80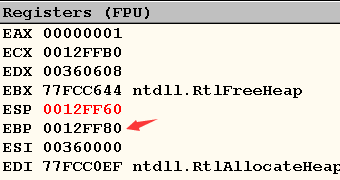
下面我们的目标是通过 DWORD SHOOT 向EBP所指的栈帧位置写入 0x77777777,我们选中内存区域中 0x003606C8 对应的部分,按空格,将 flink 修改为 payload,将 blink 修改为目标地址,如下:
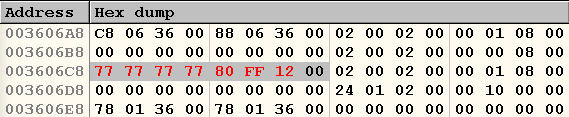 然后将程序继续运行,查看栈帧中 0x0012FF80 的位置,发现已经被成功覆盖为了 0x77777777:
0x08 堆溢出利用之代码植入
以0x7FFDF024处的RtlEnterCriticalSection()指针为目标,练习一下DWORDSHOOT 后,劫持进程、植入代码的全套动作。
首先是正常的调试代码如下:
1 |
|
运行后在可以看到尾块的地址为0x00360758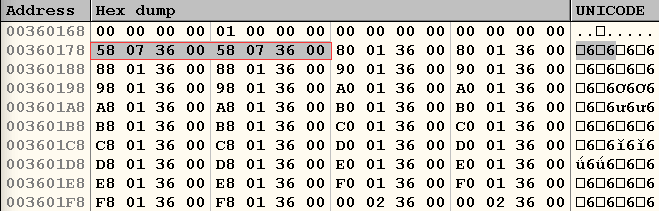
继续执行memcpy后,我们观察0x00360688处开始的数据: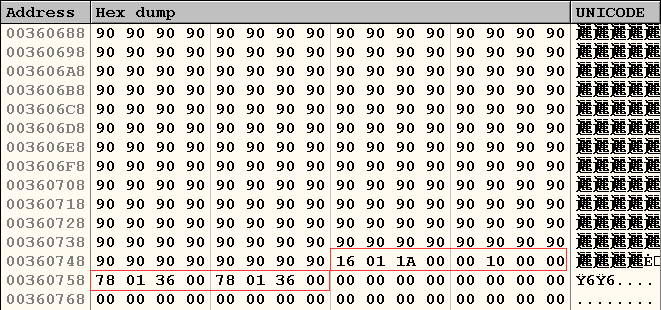
可以看到在200个0x90后正好是尾块块首的开始。所以一旦 shellcode 超过200字节,就将覆盖尾块块首。那么当h2再次申请空间时,就会导致 DWORD SHOOT。
下面我们就需要构造相应的 payload,需要注意的点如下:
- 把前200个字节用真正的弹窗 shellcode 填充。
- 紧随其后,附上 8 字节的块首信息。为了防止在 DWORD SHOOT 发生之前产生异常,直接将块首从内存中复制使用:“\x16\x01\x1A\x00\x00\x10\x00\x00”。
- 把尾块的flink覆盖为0x00360688,即shellcode的起始地址。
- 把尾块的后指针覆盖为0x7FFDF020,即P.E.B 中的RtlEnterCriticalSection()函数指针地址。
还有一个需要注意的地方是由于shellcode中的函数也要使用到被我们后面修改的PEB中的函数指针,所以我们在shellcode的开头需要修复一下函数指针:
1 | mov eax, 7ffdf020 |
最终构造的shellcode组成如下: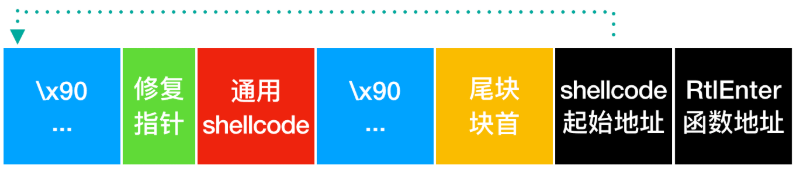
造成溢出的利用代码如下:
1 |
|
运行后,可以看到成功执行了 shellcode: